
Setting Up Encrypted Email on OSX
It has recently come to my attention that strong cryptography, while readily available (and free) is not straightforward to use for most people. Someone really ought to build some software which makes setting up and using strong encryption as easy to do as setting up a skype call, or twitter account. However, until someone gets around to doing that, we must make do with the tools we have. What follows is a step-by-step recipe for setting up PGP email encryption in the environment of the OSX operating system, commonly found on Apple computers. I will, as best as I am able, follow what are considered best practices. I will explicitly describe every step in painful detail so that even a novice should be able to follow the instructions and successfully communicate via encrypted email.
Ingredients
Apple computer (I’m using a macbook air 11 inch)
Internet connection
Access to an existing email account (preferably your own)
Small USB flash drive (optional, but recommended)
A lot of patience
Instructions
1. Turn on the computer (this is important)
2. Start Safari
Locate the “Safari” web browser in the dock (the dock is the rectangle full of icons at the bottom of the screen. It should look like this:
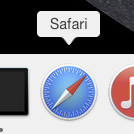
click on it. (alternatively, you can press the “command” and “space” buttons at the same time to bring up the “spotlight search” in which you can type “safari” then press enter). Safari should open.
(I realise this seems silly, since I’m giving instructions on a web page which can’t be viewed without the basic knowledge of how to turn on a computer or open a web browser, but I include these steps for completeness – in case someone printed them out and gave them to someone else to follow as you would for a food recipe, for example)
3. Dowload the programs
In the address bar of the browser, cut and paste the following links (if you are viewing these instructions in a web browser, you can clik the links directly). They should cause your browser to automatically download some files.
https://releases.gpgtools.org/GPG_Suite-2015.09.dmg
https://download.mozilla.org/?product=thunderbird-38.5.1&os=osx&lang=en-US
4. Open Finder
Locase the “Finder” icon on the dock. It looks like this:

click on it
5. Find your Downloads folder
A window should pop up, and it should be divided into two – a left sidebar with a list of things, and a right rectangle containing another list. In the left sidebar, locate “downloads” and click on it. The result should be something like:
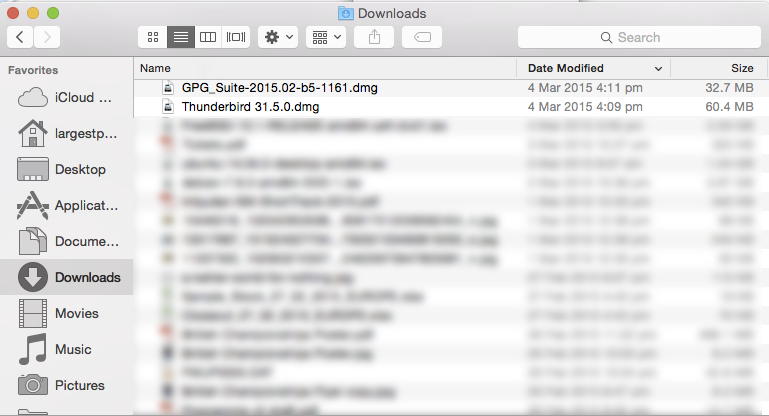
depending on how new your computer is, your list may not be as populated as mine. In any case, either at the top of the list or at the bottom, there should be the two files you recently downloaded.
6. Install GPG Suite
First, double click on the file that begins “GPG_Suite… ” a window should come up that looks like this:
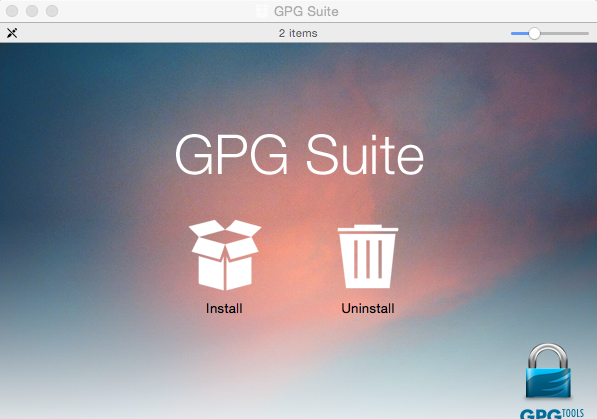
click on the “Install” icon, and follow the prompts. It should ask you for your password, and when it’s done go back to your “downloads” window.
7. Install Thunderbird
double click on the file that begins “Thunderbird… ” a window should pop up that looks like this:
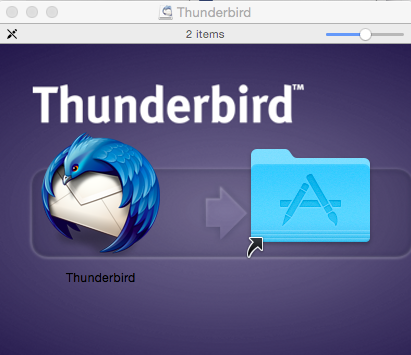
This installation process is relatively easy. Simply drag the “Thunderbird” icon onto the one that looks like a masonic logo on a folder.
8. Open Keychain Manager
This is where it begins to get complicated. Now we are going to generate a pair of PGP keys. A central concept of public key cryptography is that you have two keys – one of them decrypts messages and one of them encrypts messages. Together they are called a “keypair”. The encryption key is the one you distribute to the public (via email, or through something called a “keyserver” which functions as a directory of keys) and this is called your “public key”. The other half of the keypair is called your “private key” and you must keep it safe, because that is the key that decrypts all the emails sent to you encrypted with your public key.
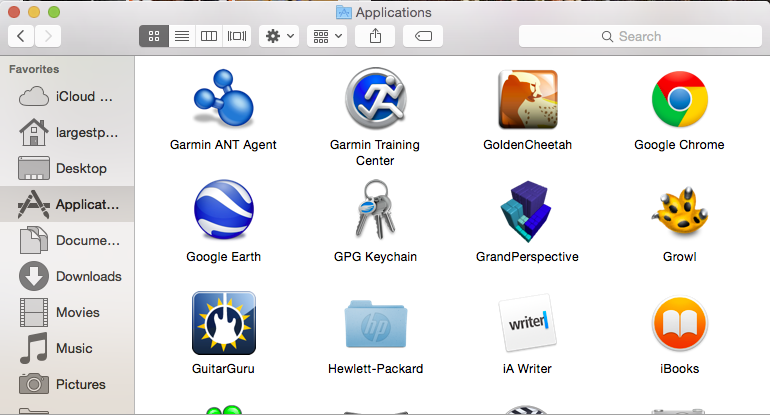
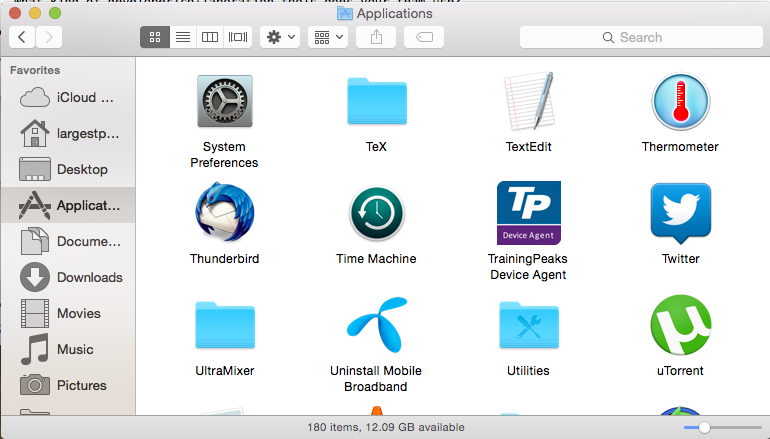
First, you must find the “GPG Keychain” program. Either look in your applications folder (similar to your downloads folder, except it is filled with applications, instead of files downloaded from the internet):
alternatively, pressing the “command” and “space” buttons on your keyboard at the same time, then typing “GPG Keychain” then pressing enter, should do the trick.
9. Generate Keys
Your keychain should be empty since you only just installed the program. It may prompt you to generate a new key at this point. If not, simply go to the top right corner of the window and click on the “new” icon. You should see a little box pop up like so:
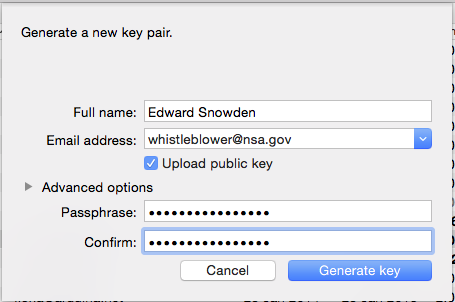
Since this is your first key, don’t worry too much about anonymity. Fill in your full name, your email address, tick the “Upload public key” checkbox, and ignore the “advanced options” (the system defaults are very good, so we don’t need to worry ourselves with those options).
The passphrase should be reasonably long, easy to remember, and contain numbers and special characters. Every time you use your private key, you will need this passphrase (although there is an option to store it in memory for a certain amount of time before it asks you again). Keep in mind that passphrase security is broken by computers that rapidly try different combinations of words, letters, numbers, and symbols, so an intentional misspelling or typo can also make things more difficult.
Then click “generate key”
10. Export Key
now there should be a total of one key in your list of keys. In the first column it should say “sec/pub” which is short for “secret” and “public”. when you start collecting other people’s keys, you will tend to only have the “pub” key. for now, ignore all the other information listed beside your key.
Right click on your own key, and click “export” and check the box that says “Include secret key in exported file”
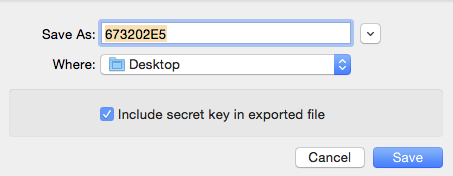
It will save a file with your private key to the desktop. Keep an eye on it.
11. Generate revoke certificate
go back to your list of keys, and right click on your own key again. This time click on “generate revoke certificate”
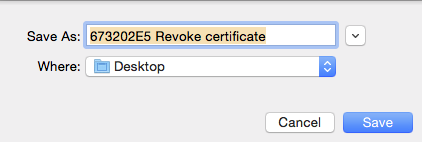
this will save a file containing a “revoke certificate” to the desktop.
12. Back up keys and certificate
Insert your little USB drive into the USB port on your computer. It should pop up on the desktop and the top-right corner should look like this:
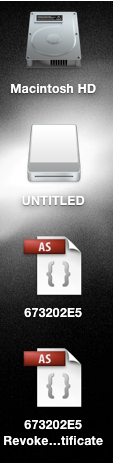
On some systems, the Macintosh HD might not be displayed. It doesn’t matter. Drag and drop both of the new files that you generated into the USB drive, in this case it is labelled “UNTITLED” because I was in a creative mood when I formatted it. Once you have put the files on the USB drive, right click on the drive and select eject. Take the drive out, and store it in a safe place. Then take the exported keypair file and the revoke certificate and drag them to the “Trash”, then right click on the trash and select “Empty Trash”
13. What did you just do?
You’ve done two important things. You’ve created a backup of your private key. If for any reason you lose the copy on your computer (like, if your computer gets stolen, for example), there is actually no way to decrypt any data encrypted with your public key without your private key. Keeping a backup safeguards against this. The revocation certificate is a slightly different thing. If your private key becomes unusable for some reason (maybe someone stole it and figured out your passphrase, or maybe you forgot your own passphrase) you can use the revoke certificate to tell the internet’s directory of public keys that your particular key is no longer in use. Once you’ve done this, nobody can use your public key (the one that is associated with the revoke certificate) to encrypt a message to you.
14. Start Thunderbird
Turning our attention back to our email program. Locate “Thunderbird” either by visual search of your applications folder, or text search by pressing “space” and “command” at the same time, then typing “thunderbird”.
click on it
15. Setup email account
When you first open Thunderbird, it should ask you if you would like a new email address, and the box looks a bit like this:
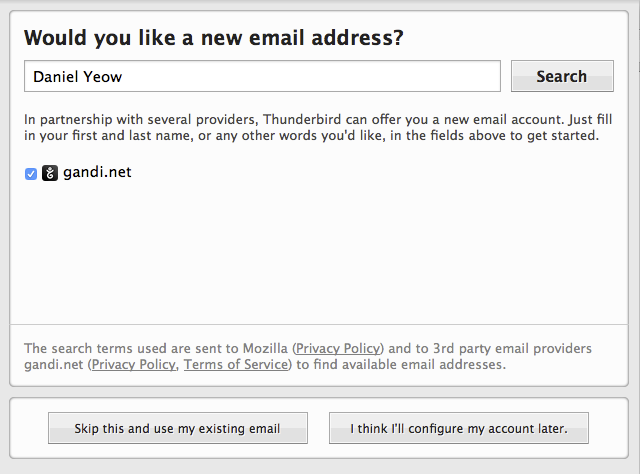
Click the button that says “skip this and use my existing email”
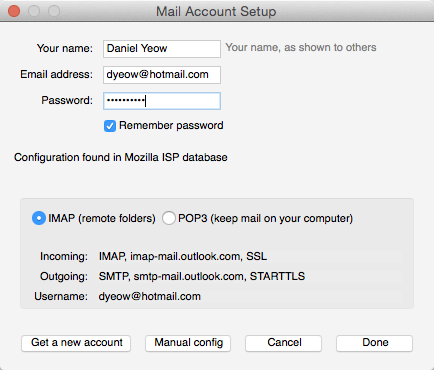
16. Fill in account details
You should get a box saying “Mail Account Setup” which you should fill in with whatever email details relate to your account. For example:

and click “Continue”
17. Complete account setup
The program is pretty smart, and can detect the settings of most common email providers such as hotmail, yahoo, gmail, etc. In this case, it collected the settings for my hotmail address. Select “IMAP” (in general, you should always select IMAP if possible) in the box below, then click “Done”.
Congratulations, you have just set up an email program to use your webmail email!
Important Note: Certain email providers like Gmail and Hotmail (among many others) may not like you connecting to their services from this “unknown location”, and you may have to delve into their settings and “enable IMAP access” (in the case of Gmail)
18. Install Enigmail Add-on
Now we want to make the email program talk to the encryption program. For that we need an extension. That extension is called “Enigmail”. To install Enigmail, go to the “Tools” menu and select “Add-ons”
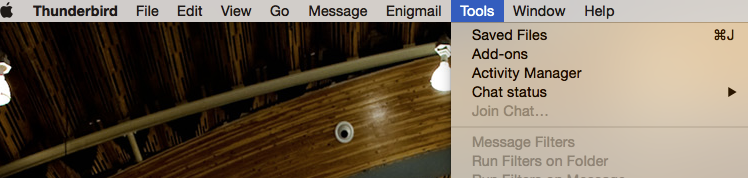
within the Add-ons window, there is a search bar in the top-right hand corner. Type “enigmail” and press enter. It should be the first search result, and simply click on it to get it. After it has downloaded and installed, it should ask you to restart Thunderbird. If there is no button presented to do this automatically, simply exit the program by pressing “command + q” then re-open Thunderbird like you did in step 14
19. Find recipient key
We’re almost ready to send an encrypted email. First, we need a recipient who also has PGP keys. I’m a pretty easy example to use, so go back to your keychain and click on “Lookup Key”
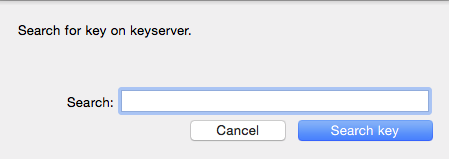
and you can type my name into the box. when you press “Search key” this should appear:
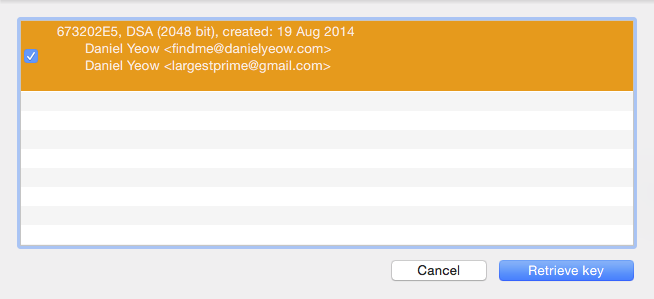
clicking “Retrieve key” will add my public key to your keychain, and you should now be able to send encryped emails to me.
20. Verify that the key is actually mine
This is actually a little bit complicated. This is done through the use of a “fingerprint”. If you right click on my key and select “details” a little information pane comes up with lots of random facts about my key. Somewhere in there is a 40-character fingerprint which you can use to verify the key to make sure that it wasn’t intercepted and changed in transit. This can be done over the phone, or in person, or through carrier pigeon. The important point is that it is verified by a means other than email which is either very public, or “real time”. You can verify the fingerprint of my key by going to the “contact” page of my website – it’s near the bottom.
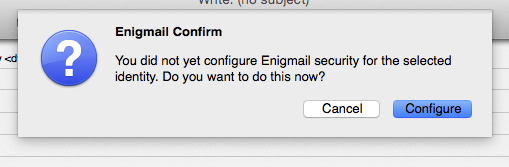
21. Configure Enigmail
To actually send me an encrypted mail, go to the Thunderbird and click “write”. The compose mail window will pop up. We haven’t configured enigmail yet, and the easiest way to do this is to simply click the Enigmail button on the top (it’s the one that looks like a padlock)
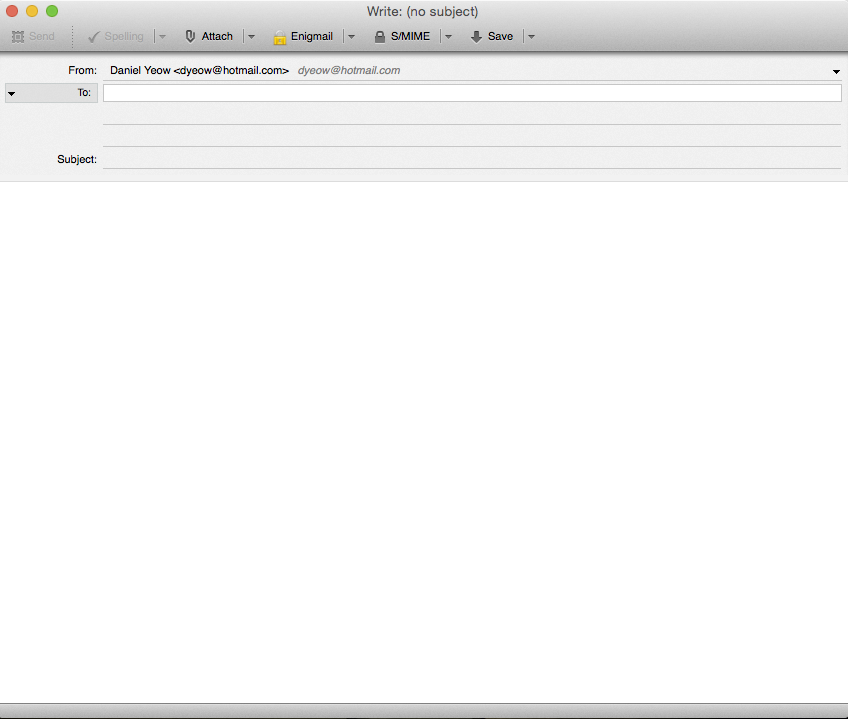
A little box should pop up asking you to configure Enigmail. Do it.
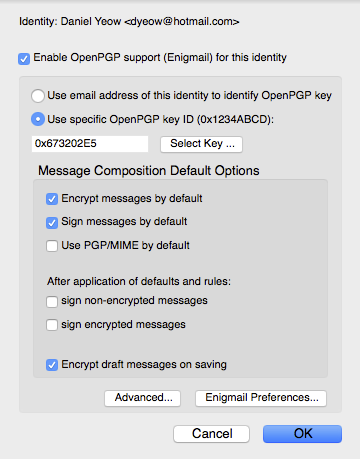
22. Set defaults
When configuring enigmail, follow what I’ve done in the box below. When you click on “Use specific OpenPGP key ID” click on Select Key, and select your own key (not mine, although you shouldn’t be able to select it, since you only have my public key and not a full keypair).
23. Send encrypted mail
Now we’re finally ready to send an encrypted email. Fill out all your fields.
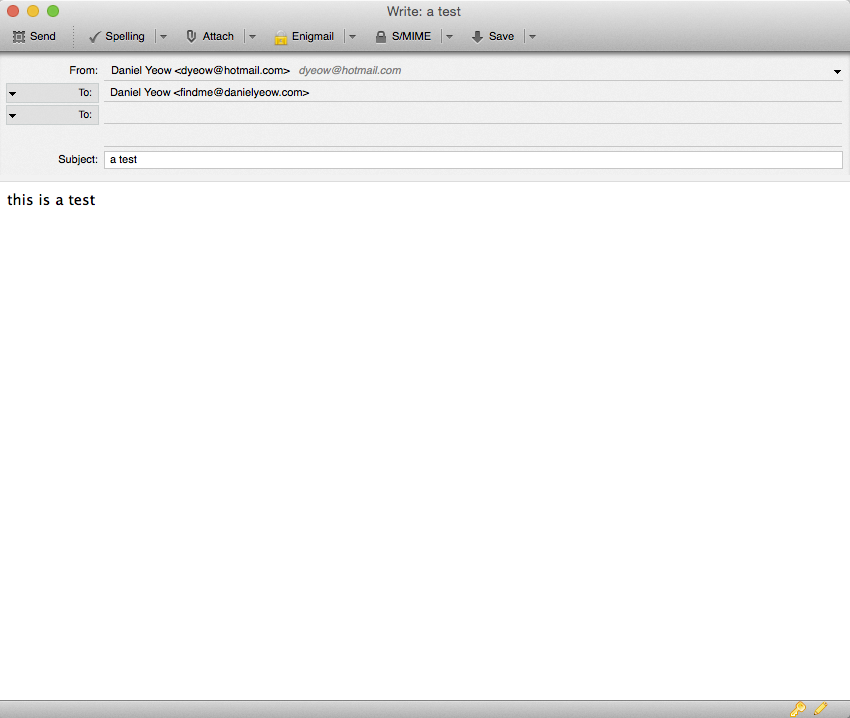
If the email in the “To:” field matches a public key in your keychain, the program should automatically encrypt any mail sent to them. Important note: the subject field is NOT encrypted, so don’t write anything important there! You may have noticed two new icons at the top of the compose window. One of them looks like a key, and the other one looks like a pencil.
Clicking on the key toggles encryption on and off.
Clicking on the pencil toggles “signing” on and off. A cryptographic signature is a small chunk of code which is encrypted using your private key. This seems silly because, since everyone has your public key, something encrypted with your private key can be decrypted by anyone with access to your public key, which is everyone. However, because only you have your private key, it is a clever way of making sure that the message actually did come from you – or at least your key.
Check that encryption and signing are toggled “on” and click send. Everything should work.
Note: if the message is the first that you’ve sent to that particular recipient, then you should also click “attach my public key” so that they have a copy of your encryption key with which to send you encrypted emails.
24. Receive mail
When the encrypted mail arrives, it should look a bit like this:
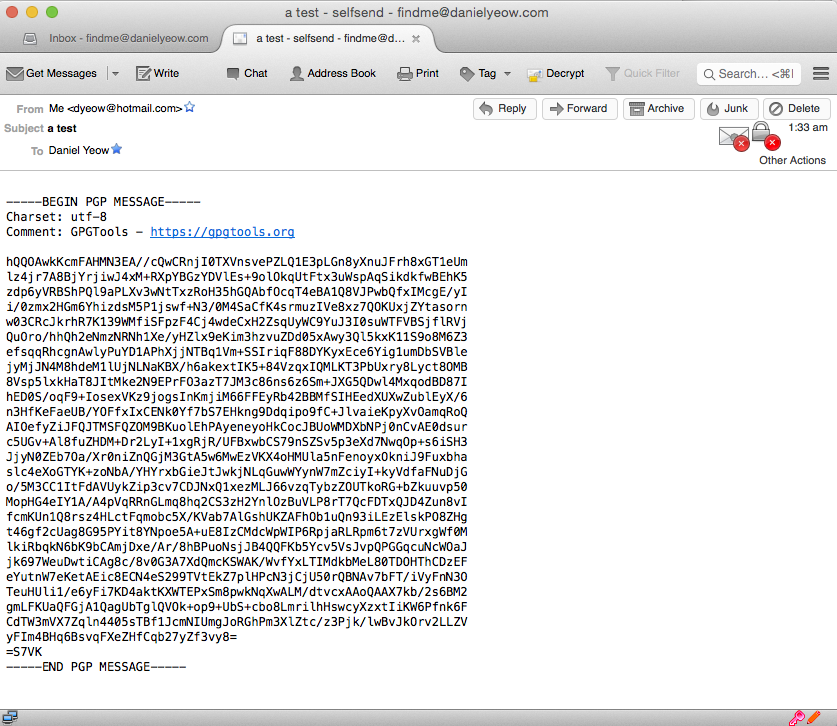
you should be prompted to enter your passphrase, and assuming you enter it correctly, this gibberish should decipher itself, and look something like this:
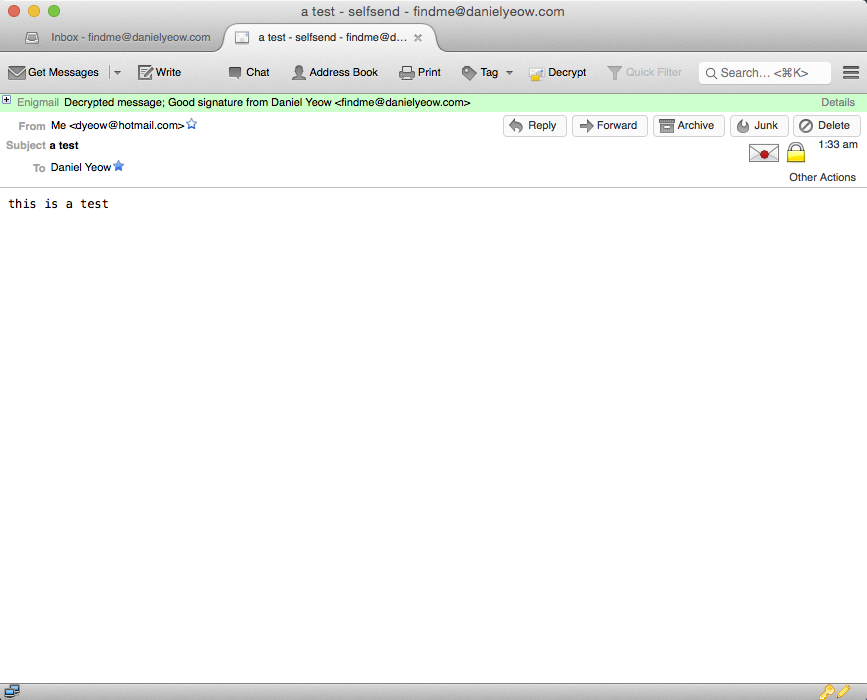
it’s kind of magical.
with any luck, I should be able to find your public key on a keyserver (they talk to each other and update each other) and send you an encrypted reply. otherwise, it used to be fairly normal practice to attach your public key to messages that you sent so that they could send encrypted mail back to you.
If anyone out there thinks that this whole process in unnecessarily complicated; I couldn’t agree more.
I’ve been messing around with PGP for a long time (it’s been around since 1991!) and it has progressed in leaps and bounds in terms of ease of installation and use, but it’s still not ready for the mainstream. Hopefully this guide can help non tech-savvy people communicate securely. Good luck, and I hope to hear from you soon!
Leave a comment