Polarize This
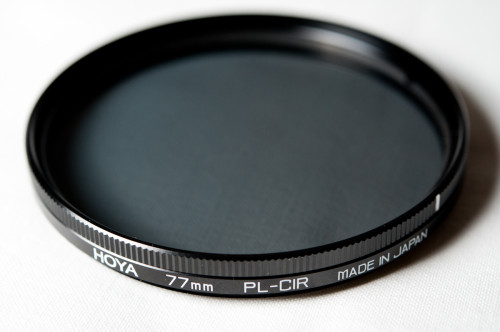
To say that equipment doesn’t matter (in Photography at least) would be a lie. They say that a bad tradesman blames his tools, but that is only because a truly good tradesman can extract a good result out of bad tools. For the best results however, good tools are a necessity. Here I will talk about a nifty little tool that I have been using ever since I got into photography in 2007 – the circular polarizing filter.
A CP filter usually screws onto the front of a lens and has the interesting property of being able to rotate. As a practical matter, this can make it difficult to tighten or loosen the filter, but it shouldn’t matter, and you shouldn’t have your filters screwed on too tightly anyway. If you ordinarily keep a UV or clear filter on the front of your lens to protect the front lens element (a good idea) then, you should take it off before placing the CP filter, rather than stack the filters on top of each other.
What does it do? It polarizes light. What does that mean? Well, light travels in waves.. well, actually in many ways it travels more like particles (actually, there’s a cool particle-wave duality thing going on here that is beyond the scope of this article, but I encourage the interested reader to look it up). So imagine light as a bunch of skipping ropes and some dude is jiggling one end of each rope and the light waves propagate down the rope. The direction that these waves “wave” is pretty random. A polarizer acts as a sort of “comb” for waves in a particular direction. If a wave is waving up and down in a direction perpendicular to the direction of the comb bristles, then it won’t go through, but if the wave direction is parallel, then it will go through.
So far, we’ve learned that a polarizer will filter out some amount of the light that runs into it, and that the direction of the light waves affects which ones get filtered out. What does this mean in the context of photography? Think about the sky for a second. Have you ever wondered why the sky is blue? The daytime sky gets its colour from light waves being scattered by the atmosphere. Without the atmosphere, the sky would be black, even in the daytime, and the sun would just light everything directly and we would get some amount of reflected light from things it hit. So light gets reflected from particles in the atmosphere, and because of the size of these particles, the light is mostly blue.
The following photos are presented in pairs, and will be most effective if you click through them.

first shot – take note of the contrast between sky and clouds, and also of the way light is reflected on the roof

the second shot, taken with the polarizer turned 90 degrees shows the difference in "cloud pop", but also in the way the roof reflects light
So here’s the rub – all light that is reflected becomes polarized in some way. The sky, being a very significant light source in photography, is basically a big source of polarized light. Depending on where you are looking in the sky, relative to the sun, the light waves you are seeing will be polarized in a slightly different direction (because for you to see them, then they will have had to be reflected at a different angle). What does this mean for CP filters? It means that filter will give your blue skies a stronger luminosity and saturation gradient than if you didn’t have the filter. This is the first and most obvious effect of having a CP filter. If you point your camera at the sky (the best effects happen when the sun is perpendicular to your angle of shooting) with your CP filter, you can “tune” the way the reflected light gets polarized by turning the filter. Then, if you turn the filter by 90 degrees, you will get another, very different effect. It’s a lot of fun.

for those who know Prague, this is facing north from Charles Bridge, pay special attention to the difference in the way the water looks
There is a second use for CP filters other than to really add oomph to your sky. I said before that all reflected light is polarized in some way. Especially reflective surfaces such as water, glass, and metals are no exception and twisting your polarizing filter with any of these in shot will “tune” the amount of reflection you get. This is very useful when you’re trying to shoot through glass and you keep getting that annoying reflection, I’ve included an example below showing maximum and minimum reflection which is simply achieved by turning the filter by 90 degrees.
A third use for a CP filter is simply as a neutral density filter. Neutral density filters are useful when you want to take photos at a wide aperture (say for example if you had one of those nifty Leica f/0.95 lenses) and low shutter speed, but there is too much light in the scene. Also useful for long exposure shots, like the ones where you draw things using light.
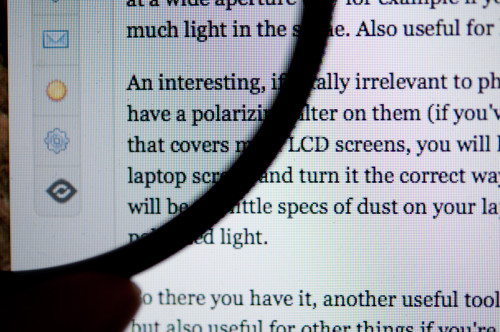
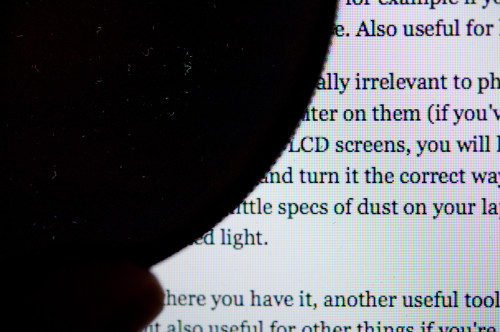
An interesting, if totally irrelevant to photography, use for a polarizing filter is to clean your laptop screen. All LCD screens have a polarizing filter on them (if you’ve ever taken apart a calculator, radio, or computer as a kid and flipped the thin film that covers most LCD screens, you will have noticed that it reverses the colours). If you hold up your polarizing filter to a laptop screen and turn it the correct way, the screen will go completely black (looking through the filter). What you will see, will be the little specs of dust on your laptop screen illuminated by the screen, yet starkly visible due to the blocking out of polarized light.
So there you have it, another useful tool of the trade. Mainly useful for outdoor landscape shots with lots of sky in the frame, but also useful for other things if you’re willing to be a little creative and experimental. These filters are reasonably easy to find as long as you’re in a city with at least one reasonably large camera shop. I bought my first CP filter in Ushuaia, Argentina, the world’s southernmost city (population 60,000). Of course, being a major launching point for Antarctic expeditions probably means that its photography shops are better-stocked than similarly-sized cities, but you get the picture.





Leave a comment