
It’s all about light
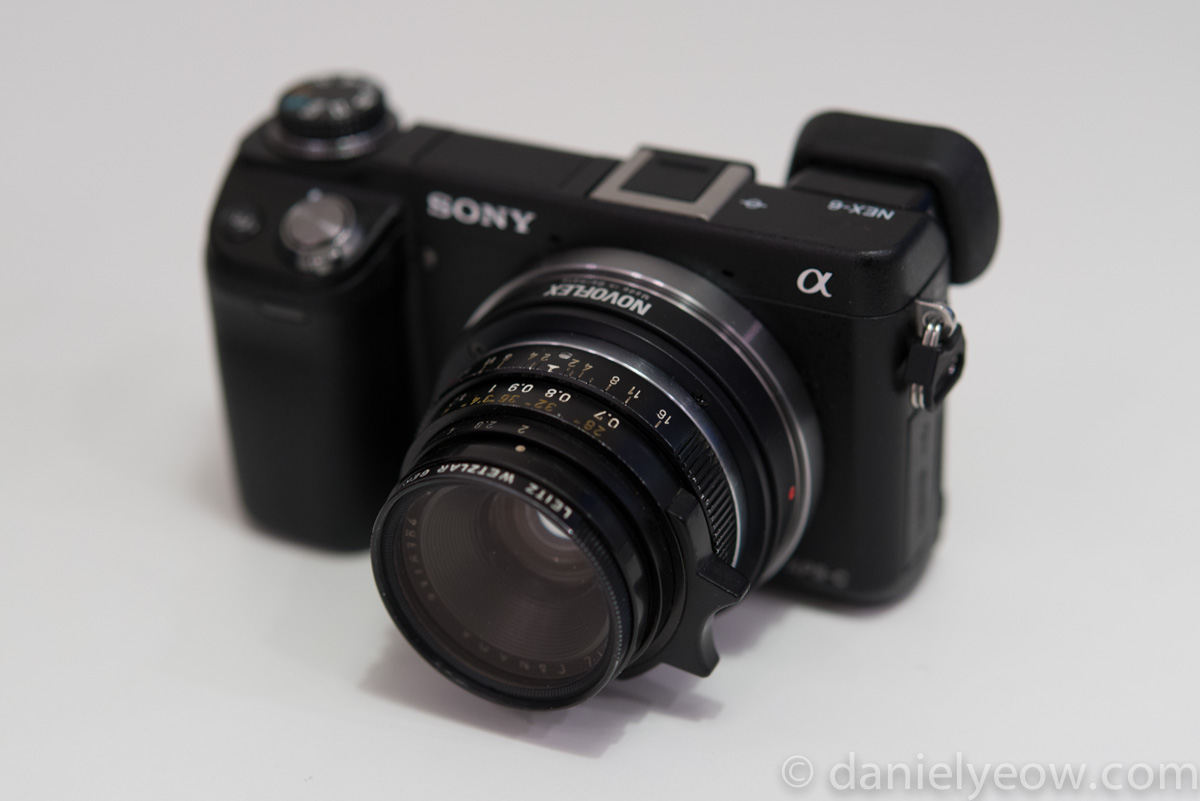
Recently I purchased as a gift one of those mirrorless interchangeable lens cameras (the Fujifilm X-M1 with 27mm lens, if you must know). The receiver of this gift, being new to photography, enthusiastically took to the task of learning how to use it to its full potential and asked me for advice. I searched the internet several times and to my surprise I couldn’t find any beginner’s guides to photography which I would consider “good”. Many of them were far too technical, and most were simply badly-written. They often suffered from that common ailment of university professors which is to explain something in such a way as to improve the understanding of the subject matter, but only if the reader is already quite familiar with the subject matter. I have a feeling that I will, to some extent, suffer from the same problem, but what follows is my attempt at a beginner’s guide to photography (with a proper camera).
Basics
The camera is not important. Try to think of it as a tool. There’s a big, exciting, three-dimensional world out there and you’re trying to capture moments of it in a still two-dimensional image (it’s a strange thing if you really think about it). The camera is there to help you do that. First, you have the lens. The lens focuses light onto the image sensor, which is basically a bunch of little dots that detect light. The camera stores this information, usually in a memory card of some kind, and then the information is later used to reconstruct the original image. Everything on the camera – all the buttons, little screens, flashes, bells, and whistles, are there to help you do this. Specifically, they are there to control how light falls on the image sensor.
Exposure
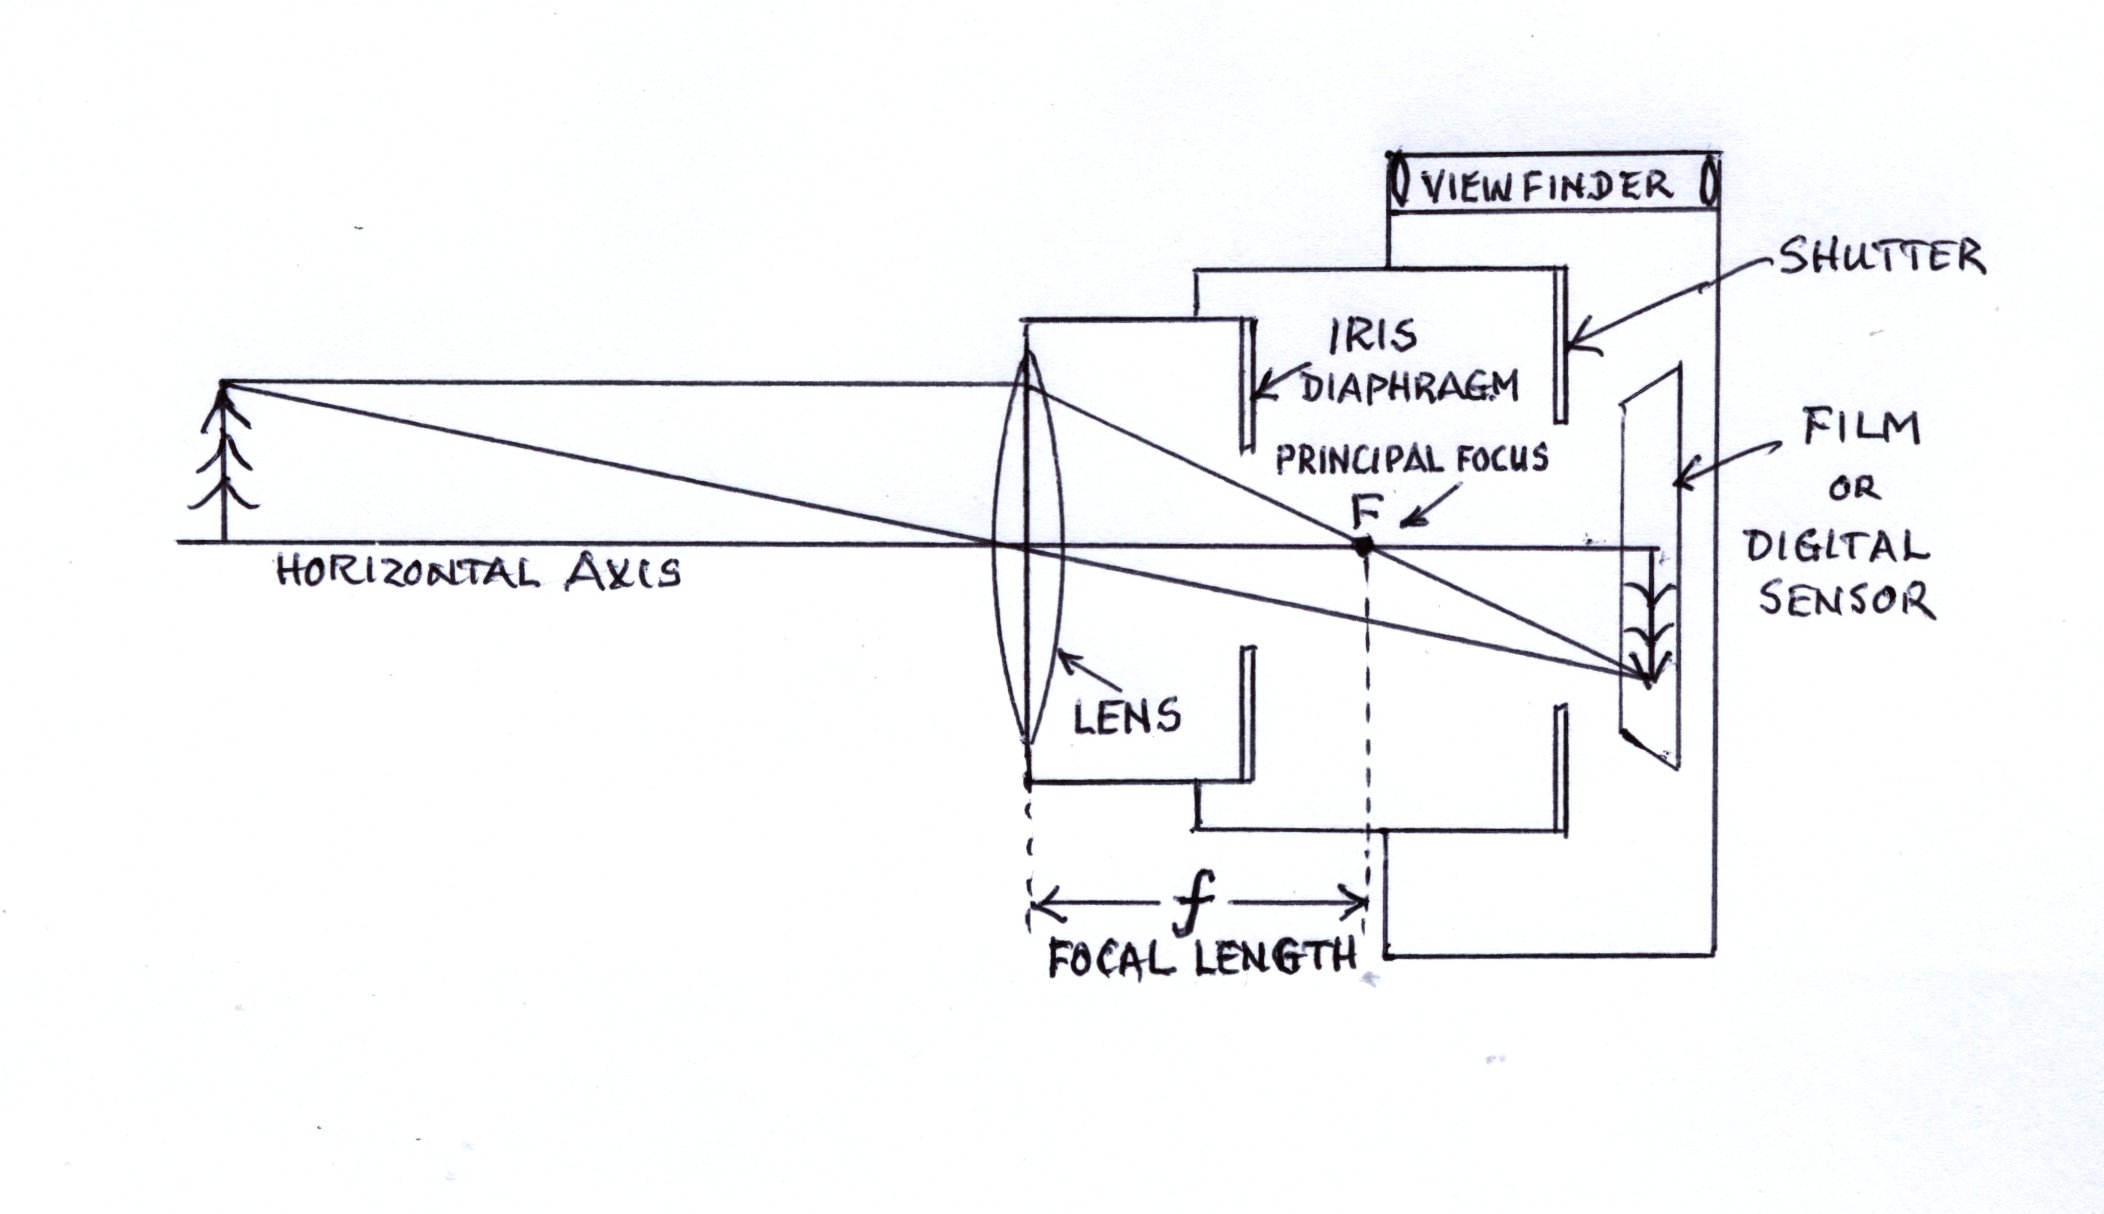
The above diagram shows the essential parts of a camera. Near the back, just in front of the sensor, is the shutter. When you press the shutter release (often thought of as “that button you press to take a photo”) the shutter opens, and then closes, exposing the sensor to light. How long the shutter stays open is described as the shutter speed. Controlling the shutter speed is the most basic way of adjusting the exposure (the amount of light the sensor is exposed to). Shutter speed is always measured in seconds, i.e. 1/10, 1/500, etc.
Near the back of most lenses, you will find the iris (look for it in the diagram above). The iris is the mechanism that controls the size of the hole (minds out of the gutter, people). The size of the hole is called the aperture. Controlling the aperture is one of the other important ways of adjusting the exposure. Aperture is measured in the rather strange unit of the “f-stop” which is defined as the ratio of the lens’s focal length to the diameter of the hole. To make things even stranger, one “stop” is usually not “one” in the way we normally think of numbers. f/1.4 for example is one “full stop” faster than f/2, which is in turn one stop faster than f/2.8. What that means is that a lens with an f-number of 1.4 will let in twice as much light over the same period of time as a lens with an f-number of 2.
Last of all, there’s the sensitivity of the film sensor. To keep old photographers happy, digital camera sensor sensitivity is defined in the same terms as it was for film, using ISO. Fortunately ISO numbers are much more intuitive than aperture numbers – ISO 200 is exactly twice as sensitive to light as ISO 100. Modern digital cameras are far superior to film with respect to their light sensitivity. My Nikon for example shoots very usable photographs all the way up to ISO 6400. In film, it is rare to get a good photo in low light out of ISO 1600 film (too grainy). Together, these three things (shutter speed, aperture, and ISO) determine how exposed your photo is. On most cameras, there is a dial or setting for aperture-priority (A), shutter priority (S, or T), program (P), or manual (M). Aperture and shutter priority are what they sound like – you set the aperture or shutter, and the camera adjusts the other variable and tries to get the correct exposure. In program mode, the camera automatically adjusts everything (except ISO), and in manual mode, you adjust everything yourself.
Measuring Light
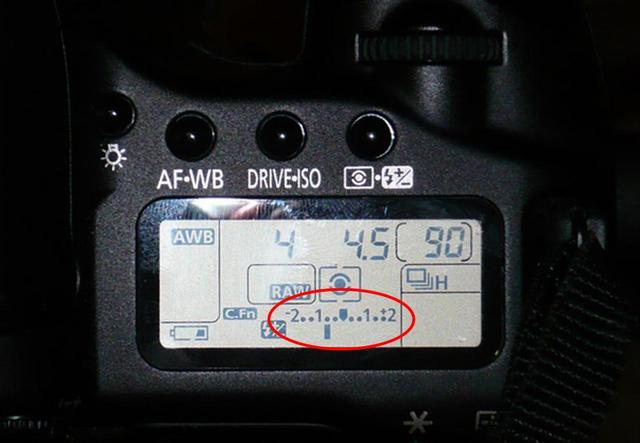
You might be thinking to yourself “well this is all very well, but how does one know when the exposure is correct?”. In order to do this, we have to measure the light somehow. Luckily for us, all cameras do this with a lightmeter (pictured above in the red ellipse. The camera counts how many photons are coming in every second and it tells us. It’s like a little game, where we adjust the shutter and aperture to get the little lightmeter indicator to be in the middle. Have you ever taken a photo of a buddy who was standing in front of something really bright, and your buddy’s face just seemed to disappear into a shadow? A camera’s lightmeter is great at counting photons, but it has no idea what you’re trying to take a photo of. In this case, it found the background (which takes up most of the frame) to be quite bright, so it adjusted the exposure down so that the average over the area of the photo would be more or less correct. This has the effect of rendering your buddy’s face as very underexposed. The opposite happens when you’re trying to take pictures of bright objects in dark rooms (e.g. a guitarist standing in a spotlight during a night time music concert). – they’ll be overexposed and seem too bright.
The thing to realise here is that, even if we’re shooting in full manual mode, these undesirable effects would still pop up. We can remedy the situation by deliberately adjusting our aperture or shutter down or up, or we can use a function available on most cameras called exposure compensation (basically, moving the goal posts on the lightmeter). Some cameras have a dedicated dial for this, while others need to have it accessed in a settings menu somewhere. The advantage of exposure compensation is that you can shoot in one of the semi-automatic modes (shutter or aperture priority) and still compensate the exposure to get a decent photo, without the hassle of worrying about both the shutter speed AND the size of your aperture. This is especially useful for those quick, impromptu snaps where you have no time to fiddle with your camera’s settings otherwise you’d miss the shot.
Aperture or Shutter?
Knowing which one of these to adjust depends a lot on what you’re trying to take a picture of, and the effect you’re going for. Automatic modes on cameras are largely unpredictable and often give you exactly the wrong setting for whatever situation you’re in. Understanding the effect of adjusting either the shutter speed or aperture is the key to knowing what adjustments to make.

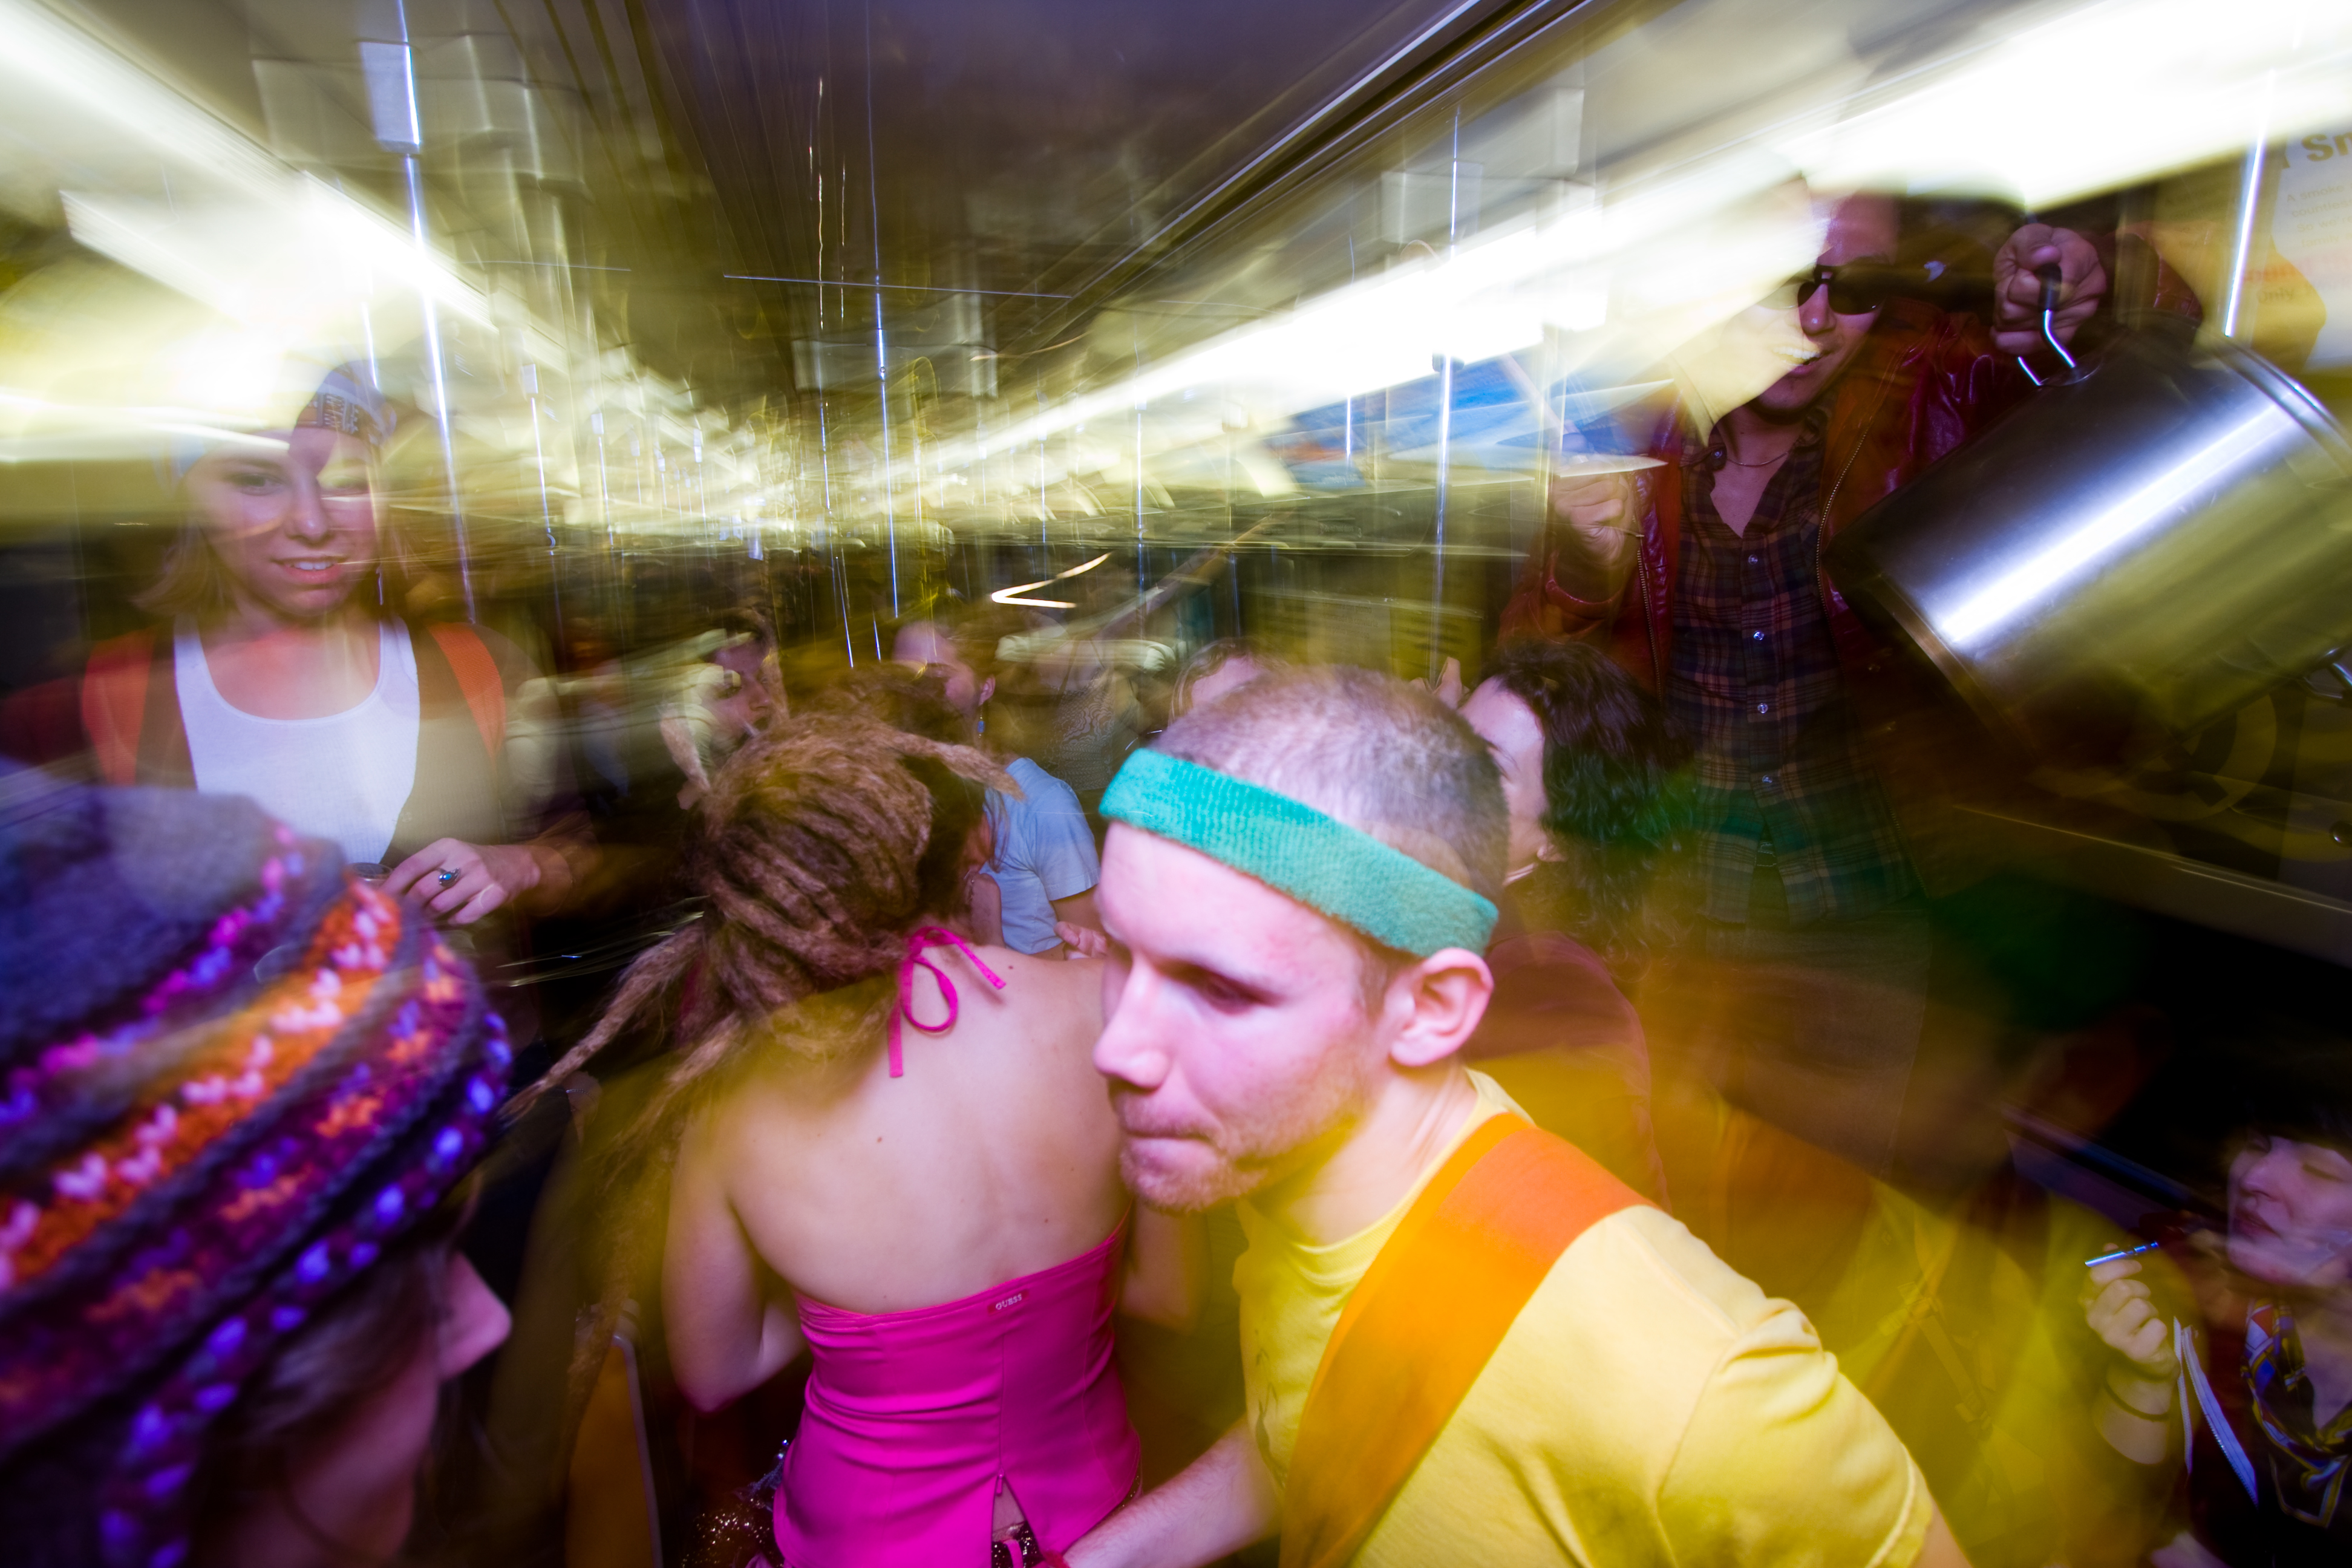
Shutter speed is an intuitively simple concept. If you set it to 1/1000 of a second, then light is only going through to the image sensor for 1/1000 of a second – perfect for sports or fancy cocktails being made with a splash (above). However, there are other instances where it is appropriate to have the shutter open for a longer time, say 1/20 of a second (or longer), to deliberately capture some motion blur (see below), perhaps against a still background (or, more challenging – a sharp, moving object against a blurred stationary background). Whichever one of these effects you go for is largely an artistic choice, but it is useful to know how to achieve these effects.

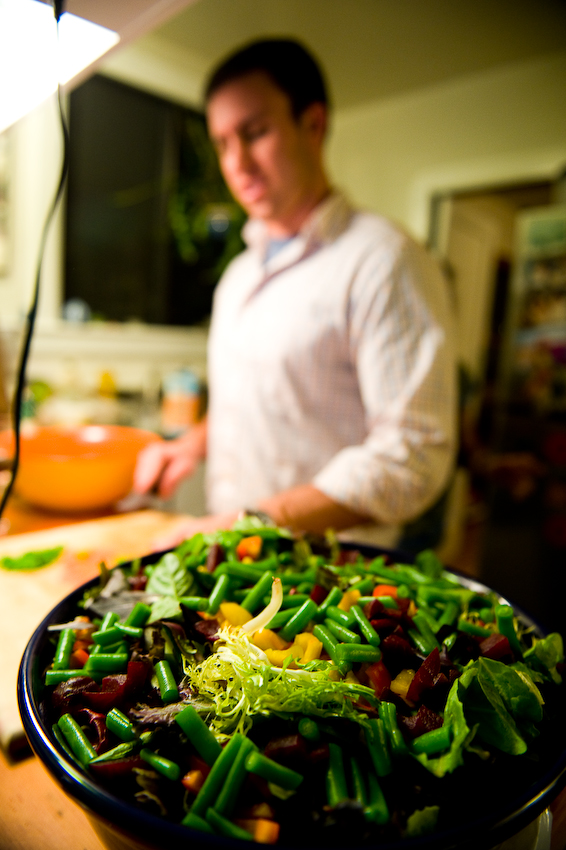
Aperture is a little bit more of a difficult concept to wrap your head around. As a general rule, the smaller the hole, the more of the image will be in focus. This can be good for sweeping landscape photographs, or architectural photography where you need to be able to see the detail in everything. A very wide open aperture means that only what you focus on (and anything else which happens to be the same distance from the lens) will be in focus. The photograph below of some salad was taken at f/2.8 which was enough to blur Tony in the background, even though he was only standing about half a metre behind the salad. I commonly shoot in aperture priority mode and select the biggest aperture for whatever lens I have. That way I know that the shutter speed that the camera selects to match the light will always be the fastest shutter speed available. If I have to really take my time to set up a shot, however, I’ll always shoot in manual mode.
There is one other thing to consider about aperture which is often missed in these guides. Most lenses, especially the fast ones (lenses with f-numbers less than 2.8) are not that sharp at f/2.8, and usually reach their best sharpness somewhere between f/4 and f/5.6. This isn’t something that a lot of people notice, but it’s something that I notice, and I’ll often shoot with my fast lenses stopped down slightly to take advantage of this.
Sensitivity
Earlier, I mentioned the sensor sensitivity, measured in ISO. You’re probably thinking “why don’t we just adjust the sensitivity to being very sensitive, and then shoot the fastest shutter speed possible and at whatever aperture we choose”. Well, as you might expect, there are tradeoffs. When I worked for a newspaper, whenever I shot sports (especially indoor), that’s pretty much exactly what I did. When your photograph is printed in a newspaper, the print quality isn’t so good, and photos are often in black and white, so the grainy texture that results from using high ISO settings isn’t noticeable. However, if you’re planning on viewing your photos on a computer screen, or printed out, then you’re going to want to minimise this “noise” as much as possible.
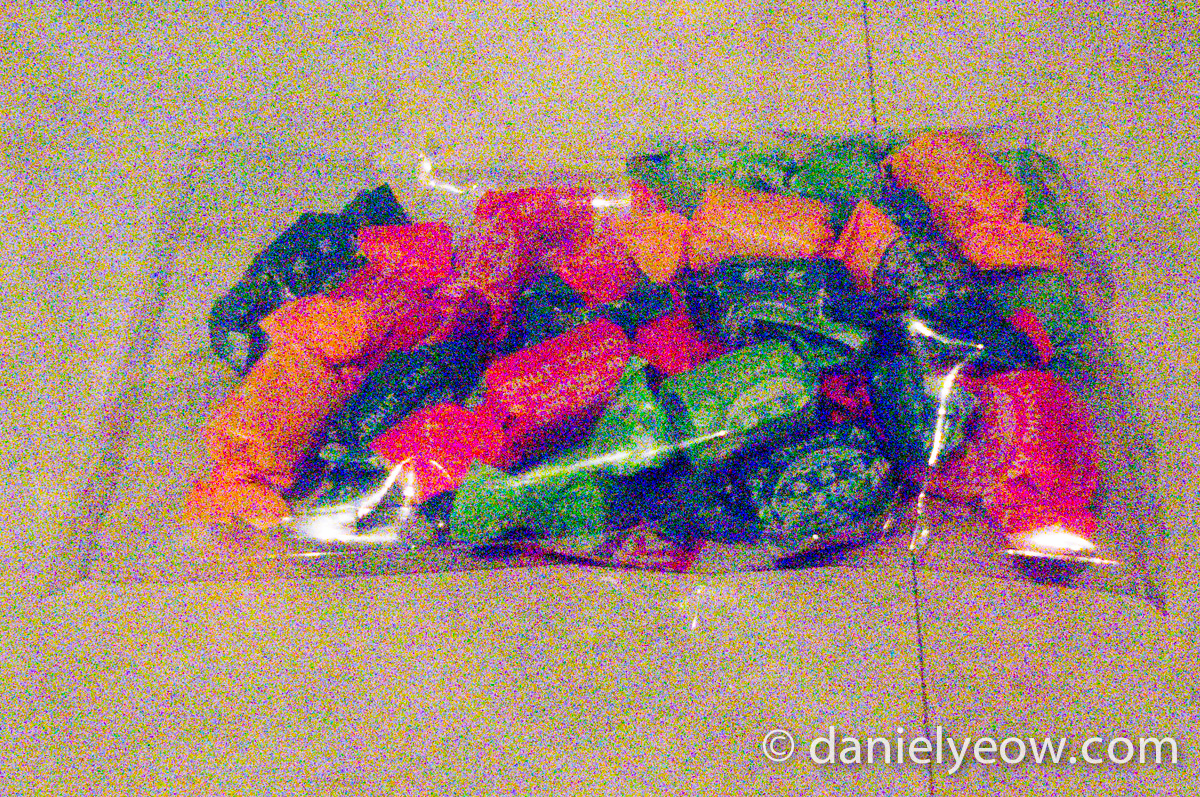
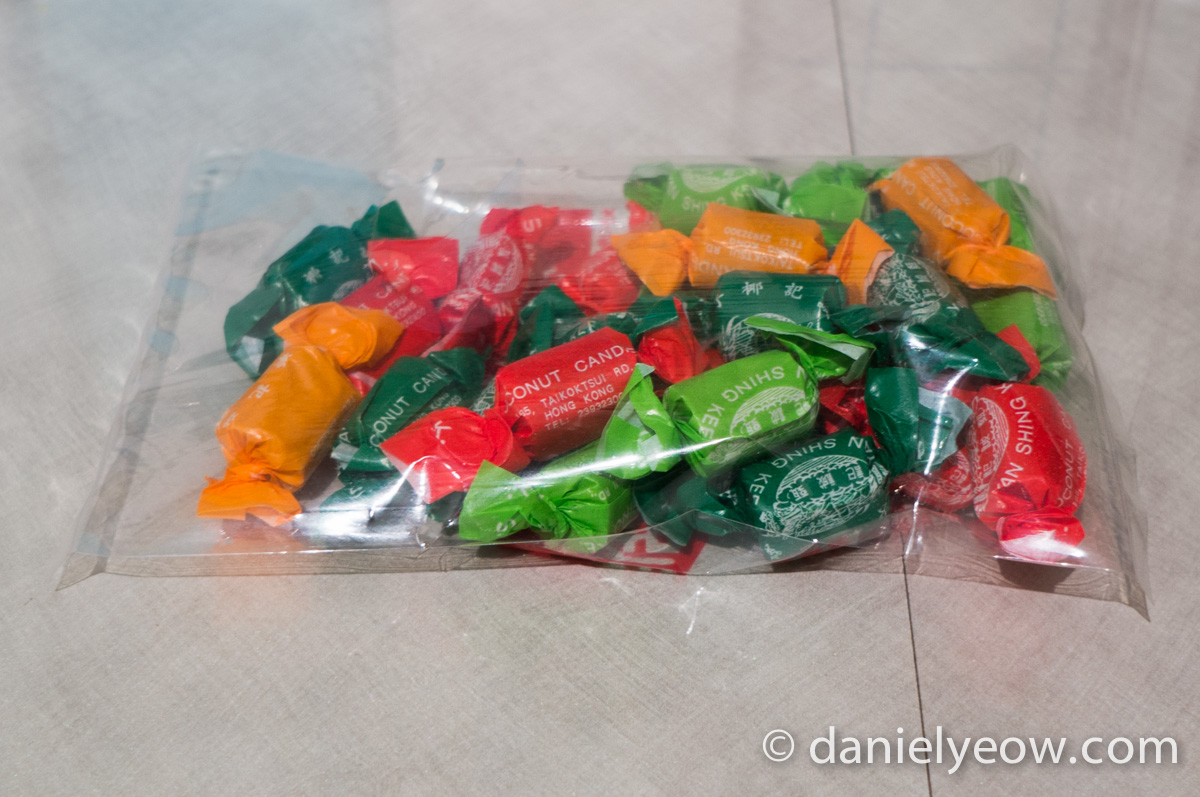
(The same object taken at ISO 25600 (left) and ISO 200 (right). Click on the pictures to observe the difference in high ISO noise.)
As a rule of thumb, I try to shoot at as low an ISO as possible, and for each individual camera I use, there’s usually an ISO setting which I will not go over. Luckily, modern sensor technology is mind-blowingly good, and that number is often very high (6400 for my Nikon), but even so, computer algorithms for noise reduction, while good, have the side effect of losing sharpness and detail in the photo.
As a general rule, even though post-production software is very good at making adjustments and correcting mistakes, there is NO SUBSTITUTE for getting it right the first time. Too many photographers in the digital age forget this, and are sloppy with their technique, and then wonder why their touched-up photos look ‘fake’.
Practice
This seems a little obvious, but it must be said – take LOTS of photos. The digital age comes with the advantage of not having to process negatives, so there’s almost no cost to taking lots of shitty photos (and a perusal of most people’s facebook photos confirms this). Experiment. Take the same photo a dozen times with different settings so you get a feel for what they do, and to familiarise yourself with the movements of changing settings on your camera so that you can do it quickly when you need to.
Look at photographs, and not only your own. Fashion magazines have some of the most technically-interesting photos around, sports magazines have some of the most technically-demanding photos around, but don’t limit yourself, look everywhere. When you see a good photo, try to think about what makes it good, and try to bring those things to your own photography. Personally, my favourite photographs come from photojournalists (Afghan Girl, and Tank Boy).
Hang out with photographers. I learned the most about photography during the time I worked at the Columbia Daily Spectator. Not only was I challenged with a wide variety of different photo assignments, but I got to hang around with other photographers, many of whom were far more experienced than I was, and was able be inspired and learn from them.
And more importantly – HAVE FUN!!
(don’t forget to click the tag ‘photography’ to read the various other articles I’ve written on the subject)
I got my bearings in photography from a super basic highly illustrated book that I bought at a camera shop in San Francisco. It’s called 40 Digital Photography Techniques (http://www.amazon.com/Digital-Photography-Techniques-John-Kim/dp/8931435010). I love how it’s filled with photos that show the difference between stepping up and down different settings. Well worth the USD10!
I was very late to the game when it comes to getting advice from others. I only ‘seriously’ started to care about my photography during my 2007 south american tour, and it wasn’t until 2008 that I actually started to learn things from other photographers while working at the spec.
One of my favourite tomes is “The Moment it Clicks” by Joe McNally which I found in a second hand bin at an NYC bookshop. Every page had a really arresting photo and on the facing page, an explanation of how he took it, as well as a little story behind the photo and what went through his head.
Also extremely valuable to my development as a photographer was a seminar/chat with Ed Keating, who won two pulitzer prizes for his photography. He’s a bit of a pot-head, but he gave a very honest talk about his life as a photographer and retold stories of breaking into places, disguising himself as a construction worker, and getting robbed while shooting on location and then finding his cameras for sale on ebay and eventually getting them back…