Anatomy of a Photograph
It seems that it has been a while since I last wrote something about photography. It’s not that I’ve given up or anything – far from it, it’s just that I’ve been busy. Since returning from India, and later Mongolia, I have travelled much, but those trips have been work-related, and I was mostly too busy to take many photos. Importantly, I was too busy to arrange my travel in such a way that good photos could be taken. That is not to say that I didn’t take any good photos, but the frequency with which I took them was noticeably lower than “normal”.
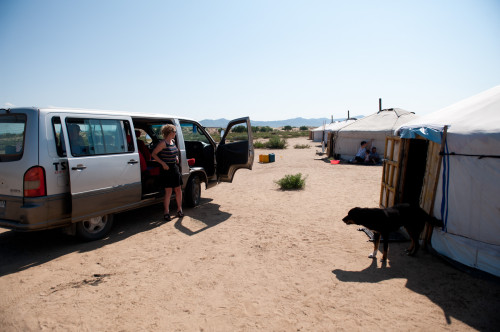
In trying to come up with something useful to say about photography beyond “practice lots”, I’ve decided to write a little “walk through” of the process of making panoramic shots. The shot I have chosen is one of my favourite circular panoramas – one of a gur. For those unfamiliar with Mongolian nomadic architecture, a gur is a large circular tent. They are constructed out of wood and felt, and can be put up and taken down in under an hour. This allows Mongolian nomads to move their location with the seasons. Capturing what a gur looks like from the outside is a simple affair, and one needs only include some landscape, throw in a few horses, and other random domestic animals and there you have it.
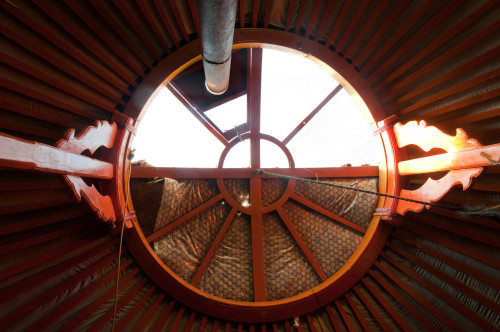
Gurs have holes in the top through which smoke from an open fire would escape. Recent technological advances have meant that “modern” gurs have metal ovens at their center and the hole in the roof is now mostly closed, save for a small chimney-hole. Capturing the interior of the gur is considerably more challenging photographically. One of the things that really strikes you about the structure is its simplicity and roundness, and that is difficult to capture in a photograph… which tends to be rectangular. Naturally, it occurred to me that a circular panoramic shot would capture the interior “feel” of a gur. So where to start?
First one stands in the center of the gur, and takes photos going all the way around. There should be generous overlap between each shot, and for a full 360 degree view, I usually take at least 12 photos. At a focal length of 24mm, and the diameter of a typical gur being about 10m it took me about 14 shots to cover the field of view.
So the first thing I do is create an image in photoshop large enough to accommodate those 14 shots in a row:
so each image is added as its own separate layer. Photoshop has a built-in function to auto-align the layers. Sometimes, if there are lots of photos, and your computer isn’t particularly powerful, it is good to align the layers in small groups at a time. In this case however, I just threw them all together at once.
For various reasons (and I’m sure one of them has to do with the fact that I shot the photos without a tripod or a spirit-level) the resulting image comes out a little crooked. Luckily this doesn’t matter too much to the final image as most of these inconsistencies “come out in the wash” so to speak. It does however pay to put a little bit of effort into straightening things out. In particular, the “vertical” poles should be made vertical. Also, the level at which the roof meets the wall should be matched at either end (to preserve the illusion of a continuous line when everything is stitched together.
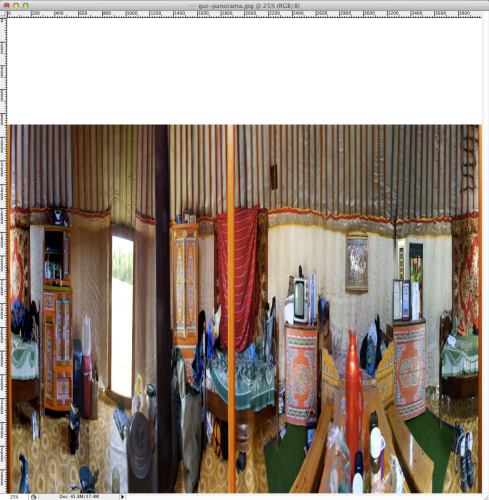
Ok, so it doesn’t look very much straighter than the first image, but this will all start to make sense soon enough. The next step is to crop the image into a rectangle.
Now the value of straightening the poles can be seen. By using the poles as the edge of the image, it is easy to “hide” some of the other inconsistencies that came up as a result of the slightly crookedly-aligned pictures. It is possible to stop the process here. Indeed many 360 panoramas of landscapes should stop at this step, as no real value is added to the image by turning it into a circle. The resulting image would look like this:
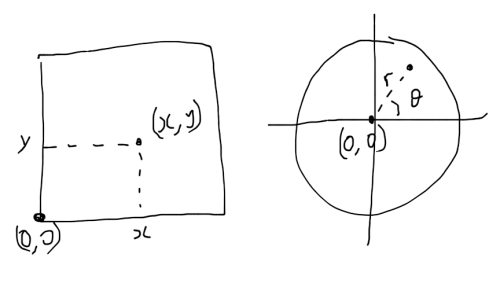
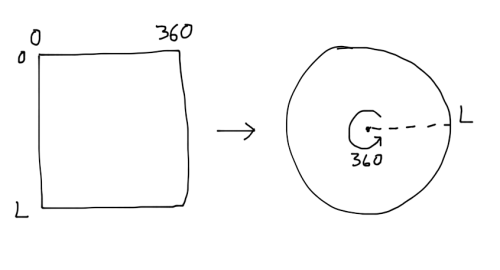
Of course… this doesn’t capture the circular-ness of a gur very well, so we will go on. Ultimately we want to take this rectangle, stitch the ends together to make a loop, then flatten that loop out to form a circle. This kind of transformation is called a rectangular coordinate to polar coordinate transformation. Rectangular coordinates are simply when every point is identified by two values – X and Y. X tells you how far across from the origin the point is, and Y tells you how far up or down a point is from the origin. Polar coordinates are a little different, they also identify every point with two values, but the values represent different things. Usually the values are ![]() and
and ![]() .
. ![]() is the radius – the distance that the point is from the origin, while
is the radius – the distance that the point is from the origin, while ![]() is the angle – if you draw a line from the origin to the point, the angle that line makes with the x-axis.
is the angle – if you draw a line from the origin to the point, the angle that line makes with the x-axis.
You don’t strictly have to understand all of this to be able to create a circular panoramic image, but understanding how the transformation works is very helpful to the process (and the maths is fun!).
So we have to “prepare” our image to be transformed into a circle. For reasons unknown to the author, photoshop requires the starting image to be a square. It is not an entirely unreasonable choice, since the resulting image will have the same height as width. Remembering how the transformation works now becomes useful because we realize that one side of the square will be “mapped” to a single point on the circle (the center), and the opposite side of the square will be mapped to the circumference of the circle.
We don’t really want all of those ceiling-struts to be mapped to a single point. Why? Because they don’t meet at a single point, they meet in a circle:
So, as part of our preparation of the rectangular image, we insert some blank space. In photoshop, this is done by extending the canvas by a few hundred pixels. The colour of the extension matters not, since we’re going to cover it with the image above.

the white rectangle at the top of this image will be transformed into a white circle at the center of the transformed image
the next step is simply to squeeze this image into the shape of a square
then we apply the following transformation:
which, when applied to the weird-looking square image above ends up looking like this:
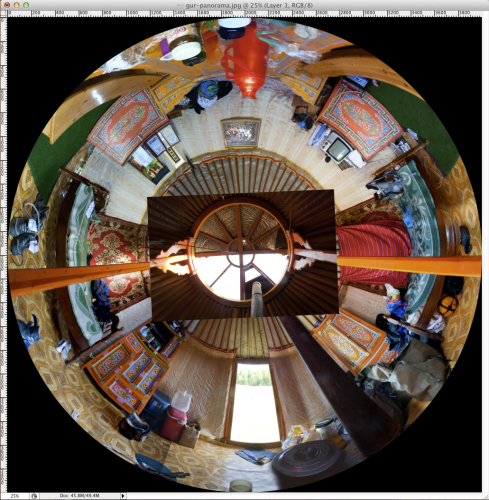
our next step is to tidy up the image a little, then plonk the center of the roof into… the center of the roof
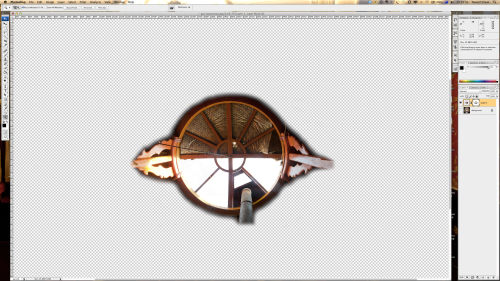
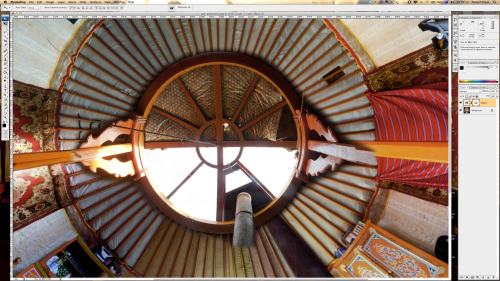
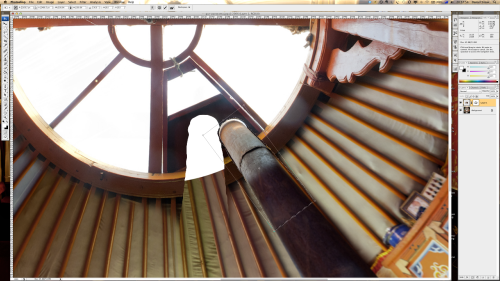
the rectangular edge of the central image is a little bit jarring… so we create what’s called a layer mask, and slowly “make transparent” all those bits which don’t “fit”. (the reason we make them transparent rather than simply erasing them, is so that we can un-erase them easily, and also so we can use different levels of transparency to blend one layer smoothly to the next). Click the images below to see the progression of cutting out the roof so that it fits.
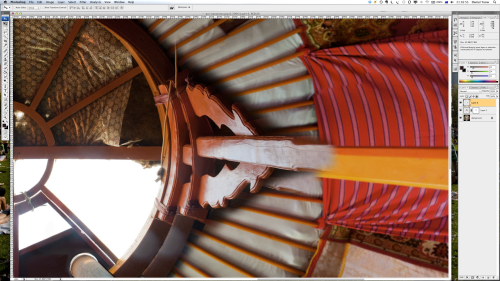
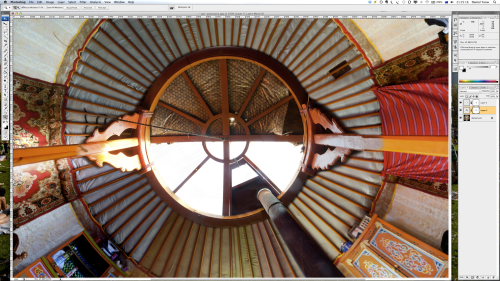
we’re almost there. One of the struts, and the chimney don’t quite match up. So with the chimney, I simply cut it out of where it currently is, and moved it, then rotated it so that it lined up with the rest of the chimney. The strut, being a slightly more complicated shape required a much more careful cutting-out, and in this case I cut it out, and created a layer copy, THEN created another layer mask so that the blend would be seamless… or as seamless as possible. (click the images)
After moving these items, I simply painted over the spaces that were left behind. With a little bit more blending and smudging, the entire section of the ceiling looks seamless… well… sort of. But you have to get really close, and look really carefully to see the seams.
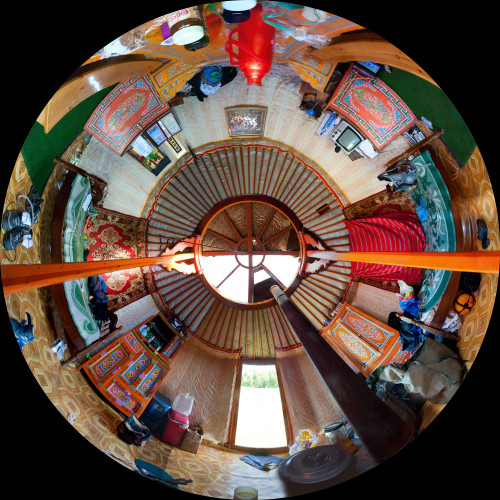
And we’re done! We merge all the layers (“flatten” the image) and then use the spot healing tools to fudge over any obvious signs that this image is a product of stitching 15 different photos together and doing a bunch of funky blends and transformations on them.
The final image I feel captures the inside of a gur very well. At once you can see its colour and diverse function. Importantly the roundness of it cannot be escaped, because seeing all of the wall at once shows that you can’t hide things in a corner even if you tried. This particular gur was the “guest gur” at a camp in Gorkhi Terelj national park, just north east of Ulaan Baatar.




Leave a comment